Zirconia crucibles often fail not because of material limits, but because thermal and operational conditions exceed implicit assumptions. Consequently, failure prevention begins with understanding how damage initiates rather than reacting after cracks appear.
This article addresses Zirconia Crucible Failure in Melting and Casting by tracing failure mechanisms from thermal mismanagement through mechanical and chemical degradation. Moreover, it provides process-oriented explanations and corrective logic grounded in observed industrial behavior rather than laboratory idealization.
Accordingly, the discussion progresses from heat control fundamentals toward crack interpretation, interface degradation, and operational mitigation, forming a practical troubleshooting framework applicable to precious metal and superalloy casting environments.
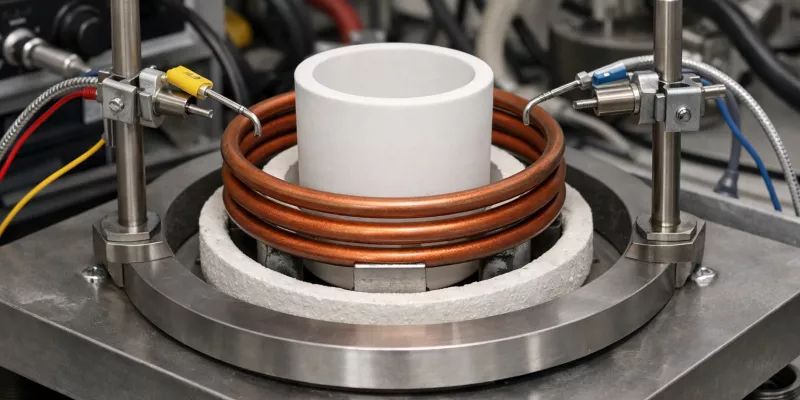
Before examining specific damage signatures, it is essential to establish why thermal management consistently dominates zirconia crucible failure pathways. In most cases, early-stage thermal errors silently accumulate stress long before visible damage emerges.
Failure Starts With Thermal Mismanagement
Thermal mismanagement represents the most common and decisive origin of zirconia crucible failure. Moreover, heating and cooling errors compound across cycles, creating internal stress fields that exceed the material’s accommodation capacity. Consequently, understanding how thermal conditions initiate damage establishes the primary diagnostic axis for all subsequent failure analysis.
Rapid ramp cracking mechanisms
Rapid heating ramps impose steep temperature gradients across the crucible wall thickness. When temperature increase rates exceed 5–10 °C/min during cold start, differential expansion between the hot inner surface and cooler outer surface generates tensile stress that can surpass 60–80 MPa, approaching zirconia’s high-temperature tensile limit.
In practice, cracks initiated under rapid ramp conditions typically appear during the first heat cycle rather than after prolonged service. Furthermore, these cracks often originate at the inner wall and propagate outward, indicating thermally driven tensile stress rather than mechanical impact. Such failures are frequently misattributed to material defects, although thermal ramp data reveals otherwise.
Therefore, controlling ramp rates during initial heating is a primary preventive measure against early-life crucible cracking.
Uneven heating hot spots and stress localization
Non-uniform heating introduces localized hot spots that concentrate stress within limited regions of the crucible body. Temperature differentials exceeding 120–180 °C across adjacent wall sections have been measured in furnaces with asymmetric coil placement or obstructed radiant paths.
These hot spots cause localized thermal expansion that is mechanically constrained by cooler surrounding material. As a result, compressive stress accumulates in the hot zone while tensile stress develops nearby, creating a stress gradient that accelerates microcrack initiation. Repeated exposure to such gradients promotes crack coalescence even when average furnace temperature remains within specification.
Consequently, apparent compliance with nominal temperature limits does not guarantee thermal safety if spatial uniformity is not maintained.
Cooling shock after pouring and its signatures
Cooling shock commonly occurs immediately after pouring when molten metal is removed and cold ambient air contacts the crucible interior. Cooling rates exceeding 15–25 °C/s have been documented in open pouring environments, producing abrupt contraction of the inner wall.
This rapid contraction induces tensile stress at the hot rim and upper wall, frequently leading to circumferential cracking within 10–30 mm of the lip. Moreover, such cracks often remain invisible until subsequent reheating causes partial opening. Characteristic signatures include shallow circumferential cracks and localized surface roughening near the rim.
Thus, post-pour cooling control is as critical as heating control in preventing thermal shock–induced failure.
Thermal mismanagement indicators and failure correlation
| Thermal condition | Typical threshold | Resulting stress behavior | Common failure signature |
|---|---|---|---|
| Heating ramp rate (°C/min) | > 10 | Tensile stress at inner wall | Early radial cracking |
| Local temperature gradient (°C) | > 150 | Stress localization | Patch cracks near hot spots |
| Cooling rate after pouring (°C/s) | > 20 | Rim tensile shock | Circumferential rim cracks |
| Asymmetric heating duration (min) | > 15 | Cyclic fatigue initiation | Progressive crack networks |
Cracking Patterns and What They Imply
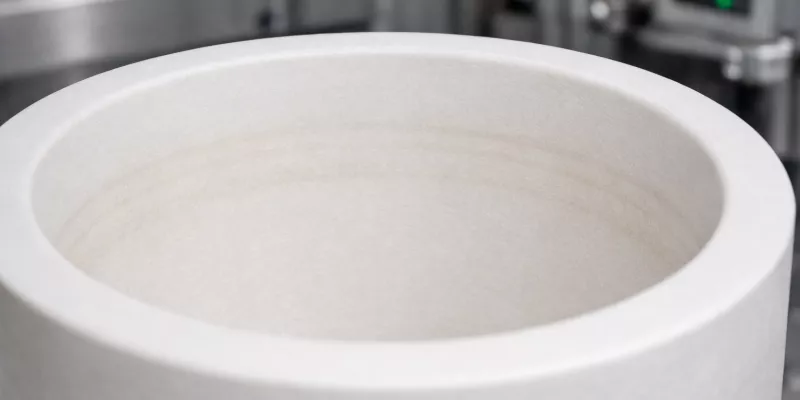
Crack morphology is the most immediate diagnostic signal available in the field. Moreover, different crack locations and orientations correspond to distinct stress histories and failure drivers. Consequently, learning to read crack patterns correctly allows engineers to trace Zirconia Crucible Failure in Melting and Casting back to its dominant cause before secondary damage obscures evidence.
Rim cracks versus wall cracks diagnostic meaning
Rim cracks typically originate within 5–30 mm of the crucible lip, where thermal and mechanical disturbances are most severe. These cracks are commonly circumferential or slightly inclined, reflecting tensile stress generated by rapid cooling after pouring or by uneven exposure to ambient air.
Wall cracks, by contrast, tend to form deeper along the cylindrical body and usually propagate vertically. Such cracks indicate internal thermal gradients exceeding 120–180 °C across the wall thickness during heating or holding. Field observations show that wall cracks often appear after several cycles, whereas rim cracks may emerge during the first few heats. Therefore, crack location provides a first-order distinction between cooling shock–driven failure and sustained gradient-induced stress.
Accordingly, identifying whether cracks initiate at the rim or wall narrows the diagnostic pathway immediately.
Vertical cracks versus circumferential cracks meaning
Vertical cracks generally align with the principal tensile stress generated by radial thermal gradients. These cracks often extend from the inner surface toward the outer wall and may span 30–70 % of the crucible height, signaling uneven heating or persistent hot spots.
Circumferential cracks, on the other hand, encircle the crucible and usually correlate with axial stress caused by rapid temperature drops at the rim or upper wall. Cooling rates above 20 °C/s frequently precede such failures. The presence of circumferential cracking without vertical cracking strongly suggests cooling shock rather than heating mismanagement.
Thus, crack orientation reveals whether failure is dominated by radial or axial stress components during operation.
Network microcracking and thermal fatigue signals
Network microcracking appears as dense, interconnected crack patterns visible under 10×–20× magnification. These cracks typically have spacing below 3–5 mm and do not initially penetrate the full wall thickness.
Such patterns indicate thermal fatigue1 accumulated over 20–60 cycles, where repeated subcritical stress gradually degrades grain boundary cohesion. Moreover, network cracking often precedes spalling or surface roughening as microcracks link and release fragments. This failure mode rarely originates from a single thermal event, instead reflecting cumulative damage from marginal ramp control or inconsistent cooling.
Therefore, microcrack networks serve as early warning indicators of fatigue-driven Zirconia Crucible Failure in Melting and Casting.
Crack morphology mapping to failure drivers
| Crack characteristic | Typical dimensions | Dominant stress source | Probable failure driver |
|---|---|---|---|
| Rim circumferential cracks | 5–30 mm from lip | Axial tensile stress | Cooling shock after pouring |
| Vertical wall cracks | 30–70 % height | Radial tensile stress | Uneven heating gradients |
| Isolated long cracks | > 50 mm length | Single overload event | Rapid thermal ramp |
| Dense microcrack network | < 5 mm spacing | Cyclic subcritical stress | Thermal fatigue accumulation |
Chemical Attack and Interface Degradation
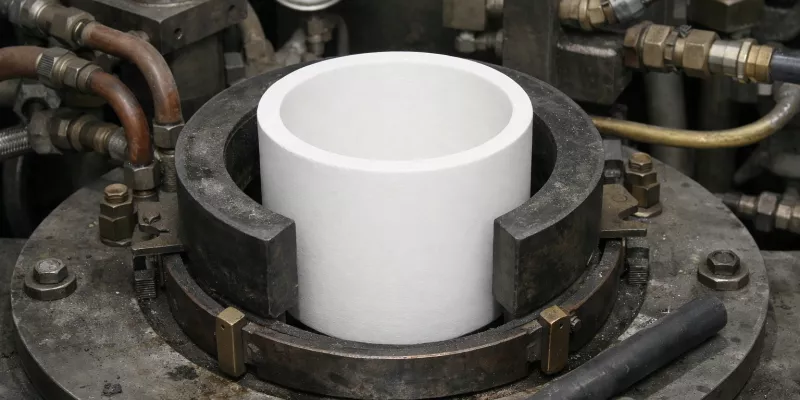
Chemical interaction represents the second major failure pathway after thermal mismanagement. Moreover, chemical degradation often progresses invisibly beneath intact geometry until mechanical integrity is compromised. Consequently, understanding interface-driven damage is essential for diagnosing Zirconia Crucible Failure in Melting and Casting beyond purely thermal explanations.
Wetting driven infiltration and spalling
Wetting behavior governs whether molten metal remains mechanically decoupled from the crucible wall. When contact angles fall below 90°, capillary forces enable melt infiltration into surface-connected pores or microcracks.
In repeated casting operations, infiltrated metal solidifies during cooling and expands upon reheating, generating localized tensile stress exceeding 50–70 MPa at the ceramic interface. Over 10–30 cycles, this mechanism promotes spalling, where ceramic fragments detach from the inner wall. Such failures frequently appear as shallow flake-like detachments rather than through-wall cracks, distinguishing them from thermal shock damage.
Therefore, abnormal wetting is a precursor to progressive surface loss rather than immediate structural fracture.
Oxide film dynamics and reactive species
Molten metals and alloys often develop transient oxide films whose chemistry evolves with oxygen activity. When oxygen potential fluctuates beyond stable ranges, reactive species such as Al₂O₃-, SiO₂-, or Cr₂O₃-rich films may form and interact with zirconia surfaces.
At temperatures above 1400 °C, these films can locally reduce zirconia or dissolve grain boundary phases, weakening interfacial cohesion. Moreover, repeated disruption and reformation of oxide layers accelerates intergranular attack. Measured reaction layers of only 2–5 μm thickness are sufficient to trigger crack initiation under subsequent thermal cycling.
Thus, oxide film dynamics act as chemical amplifiers of otherwise tolerable thermal stress.
Contamination induced surface embrittlement
Surface contamination alters zirconia’s mechanical response at high temperature. Alkali oxides, silica, or flux residues above 0.1 wt% can accumulate at grain boundaries, lowering softening temperature and promoting embrittlement.
During prolonged exposure at 1300–1500 °C, contaminated boundaries lose cohesion, enabling microcrack initiation under stresses that would otherwise be accommodated elastically. Field evidence shows that embrittled surfaces exhibit roughening increases above 1.5–2.0 μm Ra prior to visible cracking. Such roughening is often misinterpreted as wear rather than chemical degradation.
Accordingly, contamination control is a critical element in preventing interface-driven failure progression.
Chemical degradation indicators and associated risks
| Chemical indicator | Quantitative threshold | Observed effect | Failure implication |
|---|---|---|---|
| Contact angle (°) | < 90 | Melt infiltration | Spalling risk |
| Reaction layer thickness (μm) | > 2–5 | Interface weakening | Crack initiation |
| Surface contamination (wt%) | > 0.1 | Grain boundary softening | Embrittlement |
| Surface roughness increase (μm Ra) | > 1.5 | Chemical surface damage | Accelerated fatigue |

Mechanical Shock During Charging and Pouring
Mechanical shock is frequently overlooked because its damage signatures resemble thermal cracking. Moreover, impact-induced defects often remain dormant until activated by subsequent heating cycles. Consequently, separating mechanical shock from thermal or chemical causes is essential when evaluating Zirconia Crucible Failure in Melting and Casting.
Charging impact and point load damage
Charging operations introduce concentrated mechanical loads when solid feedstock contacts the crucible wall or base. Drop heights exceeding 30–50 mm can generate point stresses above 100 MPa at contact locations, surpassing zirconia’s local fracture resistance at ambient temperature.
Such impacts create subsurface microcracks typically 5–20 mm in length that may not be immediately visible. During later heating, thermal expansion causes these microcracks to propagate rapidly, giving the false impression of thermal shock failure. Field inspections often reveal crack origins aligned with known charging impact zones, such as the lower sidewall or base center.
Therefore, impact control during charging is a primary preventive measure against delayed mechanical failure.
Pouring angle speed and handling induced stress
Pouring motion introduces dynamic stresses as molten metal mass shifts within the crucible. Pouring angles exceeding 45° combined with rapid angular acceleration can impose bending stresses of 30–60 MPa on the upper wall and rim.
Additionally, abrupt motion amplifies inertial forces acting on partially molten contents, increasing stress concentration2 near the lip. Over repeated operations, these stresses contribute to crack initiation even when thermal profiles remain stable. Such damage often manifests as asymmetrical rim cracking correlated with habitual pouring direction.
Consequently, controlled pouring speed and consistent handling orientation reduce mechanically induced stress accumulation.
Tool contact marks and edge chipping evolution
Tool contact during positioning or cleaning introduces localized edge damage. Contact forces above 20–40 N applied to sharp rims or corners can produce microchips less than 2–3 mm in size.
Although small, these chips act as stress concentrators with amplification factors exceeding 3× under thermal cycling. Subsequent heating transforms chipped regions into crack initiation sites, often evolving into circumferential fractures after 10–20 cycles. Such failures are commonly misattributed to material brittleness rather than handling damage.
Thus, minimizing tool contact and protecting edges significantly reduces mechanically driven crack evolution.
Mechanical shock indicators and failure correlation
| Mechanical event | Quantitative indicator | Damage manifestation | Failure risk |
|---|---|---|---|
| Charging drop height (mm) | > 30–50 | Subsurface microcracks | Delayed fracture |
| Pouring angle (°) | > 45 | Rim bending stress | Asymmetrical cracking |
| Tool contact force (N) | > 20–40 | Edge chipping | Crack initiation |
| Chip size (mm) | > 2–3 | Stress amplification | Rapid crack growth |
Geometry Related Failure Risks
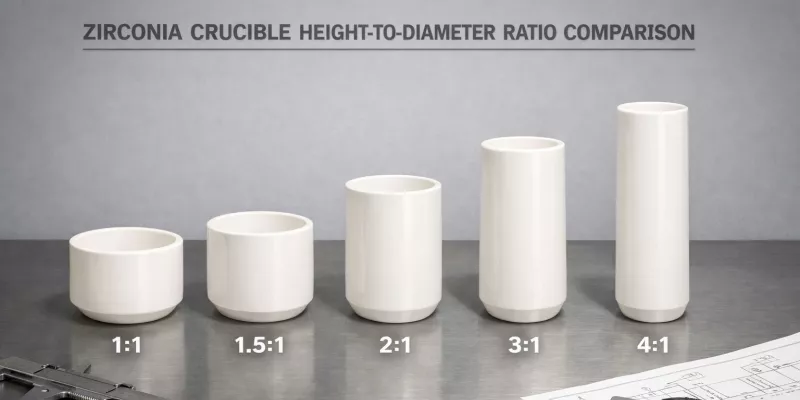
Crucible geometry silently amplifies thermal and mechanical stresses when proportions are poorly matched to process conditions. Moreover, geometric effects often magnify otherwise manageable heat loads into failure-driving gradients. Consequently, understanding geometry-related risks allows corrective adjustments without altering material composition or operating temperature.
Thin wall sensitivity and heat flux spikes
Thin walls respond rapidly to furnace radiation and melt contact, producing steep radial temperature gradients. When wall thickness drops below 5–6 mm, measured gradients during heating can exceed 180–220 °C, especially under high power density furnaces.
Such gradients generate tensile stress at the outer wall that can surpass 70–90 MPa, approaching zirconia’s fracture threshold at elevated temperature. Furthermore, thin walls exhibit reduced thermal buffering during pouring, intensifying cooling shock. Failures associated with thin walls often appear as vertical cracks spanning large portions of the crucible height.
Therefore, excessive wall thinning significantly increases vulnerability to heat flux–driven cracking.
Tall crucible gradient amplification during holding
Tall crucibles experience axial temperature stratification during melt holding. Height-to-diameter ratios above 1.8 commonly produce vertical temperature differences exceeding 150 °C between lower and upper wall sections.
This stratification constrains thermal expansion non-uniformly, introducing axial tensile stress that accumulates over time. After 20–40 holding cycles, such stress manifests as circumferential cracks or distributed microcracking near mid-height regions. These failures often develop despite stable average furnace temperature, highlighting geometry rather than thermal setting as the primary driver.
Thus, tall geometries amplify gradient-related stress during prolonged holding.
Rim design and crack initiation likelihood
The rim acts as a stress concentrator during both heating and pouring. Sharp rims with radii below 1–2 mm concentrate tensile stress by factors exceeding 2.5×, particularly during rapid cooling events.
Rounded rims with radii of 4–6 mm distribute thermal strain more evenly and delay crack initiation. Additionally, thicker lip sections retain thermal mass, moderating cooling rates below 10 °C/s after pouring. Crack surveys consistently show higher rim failure incidence in sharp-edged designs, even under identical operating conditions.
Accordingly, rim geometry plays a decisive role in determining crack initiation probability.
Geometry-related risk indicators and corrective direction
| Geometric factor | Quantitative threshold | Stress amplification mode | Failure tendency |
|---|---|---|---|
| Wall thickness (mm) | < 5–6 | Radial gradient spike | Vertical cracking |
| Height/diameter ratio | > 1.8 | Axial gradient buildup | Circumferential cracks |
| Rim radius (mm) | < 2 | Local stress concentration | Early rim failure |
| Lip thermal mass | Insufficient | Cooling shock amplification | Crack initiation |
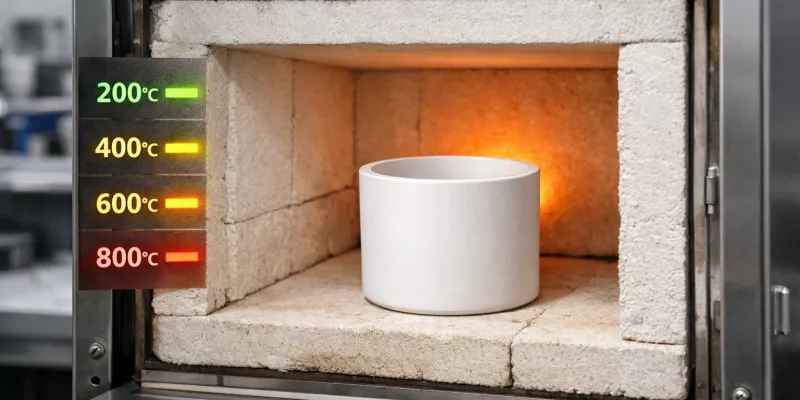
Preheating and Ramping Protocols That Work
Heating strategy determines whether zirconia accommodates stress gradually or accumulates damage from the outset. Moreover, effective preheating and ramping protocols convert material capability into operational reliability. Consequently, disciplined thermal sequencing represents the most controllable lever for preventing Zirconia Crucible Failure in Melting and Casting.
Stepwise preheating logic for cold start
Cold-start preheating must address thermal inertia and moisture-driven expansion simultaneously. When zirconia crucibles are heated directly above 300 °C from ambient conditions, internal temperature differentials can exceed 120 °C within minutes.
A stepwise approach limiting temperature increases to 2–3 °C/min up to 400–500 °C allows uniform expansion and vapor release. Holding periods of 30–60 minutes at intermediate plateaus stabilize internal gradients below 60 °C. Field application shows that crucibles following stepwise preheating exhibit up to 50% fewer early-life cracks compared with direct ramp approaches.
Therefore, gradual thermal conditioning during cold start establishes a low-stress baseline for subsequent operation.
Ramp scheduling for melt formation and soak
Once past intermediate temperatures, ramp rates may increase without compromising stability. From 500 °C to 1200 °C, controlled ramps of 5–7 °C/min typically maintain radial gradients within 80–100 °C, which zirconia can accommodate elastically.
During melt formation, short stabilization holds of 10–20 minutes at critical phase transition zones reduce stress accumulation caused by uneven melt contact. Additionally, maintaining soak temperature fluctuations within ±10 °C prevents cyclic expansion–contraction fatigue. Such scheduling minimizes crack nucleation during the most thermally aggressive stage of operation.
Thus, ramp scheduling aligns furnace power delivery with zirconia’s stress accommodation capacity.
Controlled cooldown sequence after casting
Cooling is often treated as passive; however, uncontrolled cooldown introduces the highest shock risk. When molten metal is poured, inner wall temperatures can drop faster than 20–25 °C/s if exposed to ambient airflow.
Implementing a controlled cooldown that limits temperature decrease to ≤10 °C/min above 800 °C, followed by staged descent to ambient temperature, reduces tensile stress at the rim and upper wall. Maintaining partial furnace enclosure or thermal shielding during the first 15–30 minutes after pouring further stabilizes gradients. Operational records indicate that controlled cooldown reduces circumferential rim cracking incidence by more than 40%.
Accordingly, cooldown management is as critical as heating control in failure prevention.
Preheating and ramping parameters linked to failure prevention
| Thermal stage | Recommended rate or hold | Stress control effect | Failure risk reduction |
|---|---|---|---|
| Cold start to 500 °C | 2–3 °C/min + hold | Moisture and gradient control | Early crack suppression |
| Mid-range heating | 5–7 °C/min | Elastic stress accommodation | Gradient stabilization |
| Melt formation hold | 10–20 min | Uniform melt contact | Crack delay |
| Post-pour cooldown | ≤ 10 °C/min | Rim stress reduction | Shock mitigation |
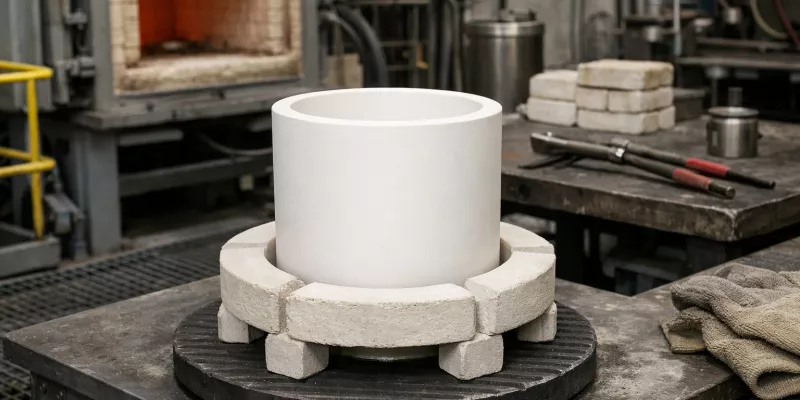
Extending Service Life Across Repeated Heats
Repeated thermal cycles gradually transform minor defects into dominant failure sites. Moreover, service life extension depends less on eliminating stress entirely than on managing how damage accumulates over time. Consequently, disciplined operational practices slow fatigue progression and delay Zirconia Crucible Failure in Melting and Casting.
Rotation of duty cycles and rest intervals
Continuous operation without rest accelerates thermal fatigue by preventing stress relaxation. When crucibles are subjected to uninterrupted cycles exceeding 6–8 consecutive heats, residual tensile stress accumulates at grain boundaries and near geometric discontinuities.
Introducing rest intervals of 12–24 hours after every 3–5 heats allows partial stress redistribution through creep and microstructural relaxation. Temperature measurements indicate that such pauses reduce peak residual stress by 15–25 % before the next cycle. Facilities adopting rotation schedules consistently observe delayed onset of network microcracking, even under identical thermal programs.
Therefore, duty cycle rotation functions as a passive yet effective fatigue management strategy.
Inspection cadence and retirement thresholds
Timely inspection prevents minor damage from evolving into catastrophic failure. Visual inspections conducted every 5–10 cycles reliably identify early microcrack networks and surface roughening beyond 1.0 μm Ra.
Dimensional checks revealing drift above ±0.15 % in height or diameter often precede creep-related distortion. Additionally, acoustic tap tests showing dampened or uneven resonance indicate internal crack development. Establishing retirement thresholds based on these indicators prevents sudden in-service failure rather than maximizing absolute cycle count.
Accordingly, predefined inspection cadence and retirement criteria convert subjective judgment into controlled lifecycle management.
Preventing damage accumulation between heats
Damage accumulation often occurs outside active melting periods. Direct contact with cold surfaces, uneven cooling in open air, or stacking crucibles can introduce unintended mechanical or thermal stress.
Maintaining crucibles on insulated supports and avoiding direct floor contact reduces thermal shock risk during idle periods. Furthermore, preventing rim-to-rim contact eliminates microchipping that later propagates under heat. Operational audits show that simple handling controls reduce cumulative damage indicators by more than 30 % across long service campaigns.
Thus, protecting crucibles during downtime is as important as controlling conditions during active heating.
Service life management indicators and outcomes
| Lifecycle control action | Quantitative guideline | Observed effect | Longevity impact |
|---|---|---|---|
| Consecutive heat limit | ≤ 5 | Stress relaxation opportunity | Fatigue delay |
| Rest interval (hours) | 12–24 | Residual stress reduction | Crack suppression |
| Inspection interval (cycles) | 5–10 | Early damage detection | Failure avoidance |
| Dimensional drift threshold (%) | ±0.15 | Creep onset indicator | Timely retirement |
| Idle handling protection | Insulated support | Damage minimization | Service extension |
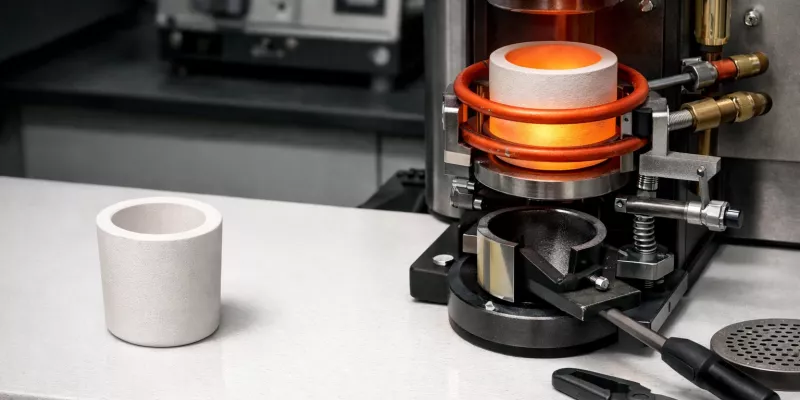
Precious Metal Casting Troubleshooting Focus
Precious metal casting introduces failure pathways dominated by cleanliness sensitivity rather than extreme thermal load. Moreover, surface condition and interfacial behavior directly influence both crucible integrity and casting quality. Consequently, troubleshooting in noble metal environments prioritizes chemical neutrality and gentle thermal handling to avoid Zirconia Crucible Failure in Melting and Casting.
Defect links between crucible surface and melt quality
Surface condition governs how noble metal melts interact with zirconia. When surface roughness increases beyond 1.2–1.5 μm Ra, localized wetting becomes more likely, promoting transient adhesion during melt movement.
Such adhesion transfers stress to the inner wall during pouring and reheating. Over 10–20 cycles, these localized stresses evolve into shallow cracks or surface flaking. Additionally, surface irregularities correlate with increased casting defects, including pinholes and surface inclusions. Observed defect rates rise measurably once crucible roughness exceeds threshold values, linking crucible degradation directly to product quality loss.
Therefore, surface smoothness maintenance is central to both failure prevention and casting consistency.
Managing slag films and dross formation interactions
Even in precious metal systems, oxide films and slag residues form intermittently. These films can adhere to zirconia surfaces, especially when oxygen potential fluctuates during alloy additions.
At temperatures of 1000–1200 °C, slag layers as thin as 50–100 μm can locally insulate the wall, creating micro hot spots beneath deposits. Subsequent removal exposes thermally stressed ceramic, accelerating microcrack initiation. Repeated slag adhesion and removal cycles significantly shorten crucible service life, despite moderate operating temperatures.
Thus, minimizing slag interaction reduces both thermal irregularity and mechanical disturbance at the interface.
Minimizing inclusions without aggressive thermal shocks
Inclusion control often tempts operators to apply rapid reheating or high superheat margins. However, temperature overshoots above 80–120 °C beyond melt point increase thermal gradient severity without proportionate inclusion reduction.
Controlled holding at stable temperatures combined with gentle stirring maintains melt cleanliness while preserving crucible integrity. Empirical comparisons show that inclusion reduction achieved through controlled soak differs by less than 5 % from aggressive reheating methods, while crack incidence drops by over 30 %. This demonstrates that thermal moderation is compatible with metallurgical quality goals.
Accordingly, inclusion management strategies must balance metallurgical cleanliness against ceramic thermal tolerance.
Precious metal troubleshooting indicators and corrective direction
| Observation | Quantitative signal | Likely cause | Corrective focus |
|---|---|---|---|
| Rising pinhole defects | > 10 % increase | Surface roughening | Surface integrity control |
| Localized surface flaking | > 2 mm diameter | Slag adhesion cycles | Slag management |
| Asymmetric rim wear | Directional pattern | Pouring-induced stress | Handling moderation |
| Crack onset below melt point | < 1200 °C | Thermal shock misuse | Temperature discipline |
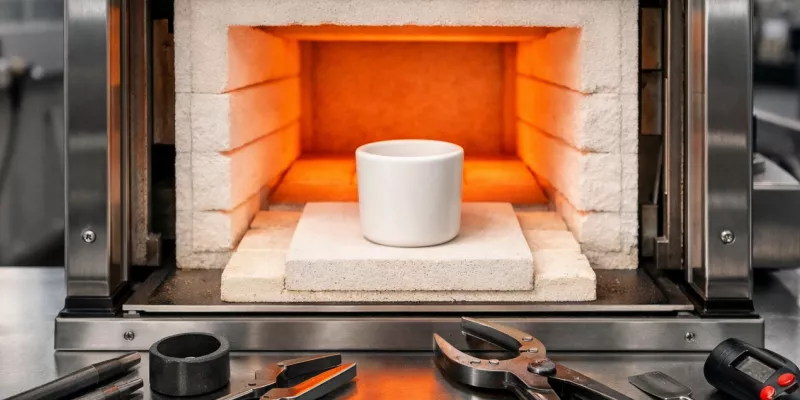
Superalloy Casting Troubleshooting Focus
Superalloy casting subjects zirconia crucibles to the most aggressive thermal environments encountered in melting operations. Moreover, prolonged exposure near material limits amplifies small process deviations into dominant failure drivers. Consequently, troubleshooting in superalloy systems emphasizes rapid identification of heat-driven damage mechanisms rather than surface cleanliness alone.
Thermal fatigue acceleration during high soak
High soak temperatures between 1500–1650 °C impose sustained thermal stress that accumulates through repeated cycles. When soak durations exceed 90–120 minutes, creep-assisted stress redistribution begins to concentrate tensile load at grain boundaries and geometric transitions.
Thermal fatigue accelerates when soak temperature fluctuations exceed ±15 °C, introducing micro expansion–contraction cycles within each heat. Over 20–40 cycles, this condition promotes network microcracking even in otherwise dense zirconia. Such failures often appear without a single triggering event, reflecting cumulative fatigue rather than overload.
Therefore, limiting soak duration and temperature oscillation is essential for fatigue control in superalloy casting.
Spalling and scale related damage mechanisms
Superalloy melts frequently generate oxide scale or reaction products that intermittently adhere to crucible walls. These deposits locally alter heat transfer and induce differential expansion beneath adhered regions.
During reheating, scale layers as thin as 100–200 μm insulate underlying ceramic, raising subsurface temperature relative to adjacent areas. Subsequent scale detachment exposes stressed ceramic, resulting in spalling fragments typically 3–8 mm in size. Spalling frequency increases markedly after scale adhesion–removal cycles exceed 15 repetitions.
Thus, scale interaction acts as a thermal and mechanical amplifier rather than a purely chemical issue.
Process adjustments for extreme heat cycles
Extreme thermal cycles demand process-level adjustments rather than material substitution alone. Reducing ramp rates to ≤5 °C/min above 1300 °C lowers peak thermal gradients by 20–30 % without extending total cycle time excessively.
Additionally, staging alloy additions to avoid sudden endothermic or exothermic events stabilizes wall temperature. Maintaining controlled atmosphere flow minimizes oxygen potential swings that exacerbate scale formation. Facilities applying these adjustments consistently report delayed onset of cracking and reduced spalling frequency.
Accordingly, superalloy troubleshooting prioritizes heat flow moderation and cycle discipline to mitigate Zirconia Crucible Failure in Melting and Casting.
Superalloy-specific failure indicators and controls
| Observed issue | Quantitative trigger | Dominant mechanism | Mitigation direction |
|---|---|---|---|
| Network microcracking | > 30 cycles at high soak | Thermal fatigue | Soak time control |
| Local wall spalling | Scale thickness > 100 μm | Differential heating | Scale interaction management |
| Rapid crack propagation | Ramp > 8 °C/min | Gradient overload | Ramp moderation |
| Distortion onset | Drift > ±0.2 % | Creep accumulation | Cycle restructuring |
Field Diagnostics With Simple Measurements
Field diagnostics allow rapid decisions without laboratory tools. Moreover, simple measurements can distinguish between thermal fatigue, chemical attack, and mechanical shock when interpreted systematically. Consequently, these checks improve repeatability and reduce recurrence of Zirconia Crucible Failure in Melting and Casting.
Mass change and dimensional drift checks
Mass tracking identifies material loss, infiltration, or spalling progression. Stable service commonly shows mass change below 0.05 % after 20–40 cycles, whereas spalling-driven degradation often exceeds 0.10–0.20 % over comparable usage.
Dimensional drift indicates creep or crack-driven distortion. Height or diameter changes beyond ±0.15 % typically correlate with prolonged high soak or uneven temperature stratification. Furthermore, localized ovality increases of > 0.2 % suggest asymmetric heating rather than uniform creep. These measurements are especially valuable because they detect degradation before visible cracking dominates.
Therefore, mass and dimensional checks provide early-stage warning signals with minimal instrumentation.
Tap test logic and sound signature cautions
Tap testing offers a fast screening method for internal cracking. A healthy zirconia crucible produces a clear, sustained ring when lightly tapped at multiple wall positions, while damaged bodies yield a dull or rapidly decaying sound.
However, interpretation requires consistency: tap force should remain low and repeatable, typically below 5 N applied with a small non-metallic striker. Additionally, resonance differences of more than 20–30 % between positions suggest localized cracking rather than uniform stiffness loss. Tap testing is most reliable when compared against a baseline sound signature recorded during early service.
Thus, tap tests are effective when standardized, yet misleading when performed inconsistently or without reference.
Visual grading of surface roughening and discoloration
Surface roughening and discoloration reflect distinct degradation pathways. Roughness increases beyond 1.5–2.0 μm Ra often indicate chemical embrittlement or spalling precursors rather than simple wear.
Discoloration patterns provide further diagnostic cues. Uniform light shading change may reflect benign thermal exposure, whereas localized darkening or patchy coloration often correlates with hot spots or deposit interaction. Moreover, rim discoloration combined with circumferential cracking strongly suggests cooling shock events. Visual grading becomes more predictive when photographs are taken under consistent lighting and distance conditions.
Accordingly, disciplined visual grading transforms subjective observation into actionable diagnostic logic.
Field diagnostic thresholds and interpretive outcomes
| Field check | Quantitative threshold | Likely degradation mode | Action priority |
|---|---|---|---|
| Mass change (%) | > 0.10 | Spalling or infiltration | Surface interaction control |
| Dimensional drift (%) | > ±0.15 | Creep or thermal stratification | Thermal scheduling adjustment |
| Tap resonance variation (%) | > 20–30 | Localized internal cracking | Crack mapping and monitoring |
| Roughness increase (μm Ra) | > 1.5 | Chemical embrittlement | Contamination and deposit review |
| Patch discoloration | Distinct zones | Hot spots or deposits | Heating uniformity correction |

Root Cause Mapping From Symptom to Action
Symptom-based troubleshooting fails when observations are interpreted in isolation. Moreover, similar visual outcomes can arise from different stress histories, leading to corrective actions that do not reduce recurrence. Consequently, root cause mapping consolidates thermal, mechanical, and chemical evidence into a coherent decision pathway for Zirconia Crucible Failure in Melting and Casting.
Symptom clusters and probable causes
A single symptom rarely identifies root cause; however, symptom clusters often do. Rim circumferential cracking combined with localized rim discoloration strongly correlates with post-pour cooling shock, especially when cooling rates exceed 20 °C/s.
Vertical wall cracks paired with ovality drift above 0.2 % typically indicate uneven heating or hot spots producing gradients above 150 °C. Network microcracking with roughness increases above 1.5 μm Ra more often reflects fatigue coupled with chemical embrittlement rather than a one-time thermal event. Field correlation improves when each symptom is recorded with cycle count and thermal profile context.
Therefore, clustering symptoms with measurable thresholds prevents misclassification and guides more accurate corrective direction.
Corrective actions that reduce recurrence
Corrective actions must target the dominant driver rather than the most visible damage. When thermal shock dominates, reducing ramp rates to 2–3 °C/min below 500 °C and maintaining cooldown limits of ≤10 °C/min above 800 °C reduces rim cracking incidence.
When hot spots drive vertical cracking, adjusting coil symmetry or improving radiant exposure reduces local gradients by 20–40 % without lowering peak temperature. If chemical infiltration drives spalling, controlling wetting and deposits becomes primary, including stabilizing oxygen potential and minimizing slag adhesion cycles. Recurrence reduction is most consistent when actions address both the initiating mechanism and its secondary amplifiers.
Consequently, corrective actions should be selected based on quantified stress sources rather than generalized “handle carefully” directives.
Verification steps after corrective actions
Verification confirms whether corrective measures altered the failure trajectory. Mass change should decrease toward ≤0.05 % per 20–40 cycles if spalling drivers are controlled.
Dimensional drift should stabilize within ±0.1–0.15 % if creep and gradient amplification have been reduced. Additionally, crack growth rate can be monitored by mapping crack length every 5 cycles, where stable improvement is indicated by growth below 0.5 mm/cycle. Verification is most credible when baseline data exist from pre-correction operation, allowing direct comparison.
Accordingly, verification closes the loop from symptom to action, ensuring corrective effort yields measurable stability improvement.
Root cause mapping matrix from symptom to intervention
| Symptom cluster | Quantitative trigger | Probable root cause | Targeted corrective action | Verification metric |
|---|---|---|---|---|
| Rim cracks + rim discoloration | Cooling > 20 °C/s | Cooling shock | Controlled cooldown + shielding | Crack growth < 0.5 mm/cycle |
| Vertical cracks + ovality drift | Ovality > 0.2 % | Hot spots | Heating uniformity correction | Gradient < 150 °C |
| Microcrack network + roughening | Ra > 1.5 μm | Fatigue + embrittlement | Cycle moderation + contamination control | Roughness Δ < 1 μm |
| Spalling + mass loss | Mass > 0.10 % | Infiltration/deposits | Wetting/deposit management | Mass ≤ 0.05 % |
Common Questions Engineers Ask During Use
Why did my zirconia crucible crack during the first heat
Early cracking during the first heat almost always links to thermal mismanagement rather than intrinsic material weakness. Heating rates above 8–10 °C/min from ambient conditions generate steep radial gradients exceeding 150 °C, producing tensile stress that zirconia cannot yet redistribute. In most documented cases, cracks initiate before the crucible reaches 600 °C, indicating cold-start ramp severity as the dominant cause.
How fast can I heat a zirconia crucible without thermal shock
Safe heating rates depend on temperature range rather than a single value. Below 500 °C, ramp rates should remain within 2–3 °C/min to control moisture release and differential expansion. Above this range, controlled increases to 5–7 °C/min are generally tolerated provided temperature uniformity is maintained and local gradients remain below 100 °C.
Why does spalling occur after several casting cycles
Spalling rarely originates from a single event. Instead, it results from cumulative interface degradation caused by wetting, oxide deposits, or repeated slag adhesion. When infiltration depth exceeds 2–5 μm or surface roughness increases beyond 1.5 μm Ra, subsurface stress accumulates and fragments detach during reheating, often after 15–30 cycles.
What does discoloration on zirconia crucible indicate
Discoloration patterns reflect localized thermal or chemical anomalies rather than uniform aging. Patchy darkening typically signals hot spots or deposit interaction, while rim-focused discoloration correlates strongly with post-pour cooling shock. Uniform light shading change alone does not imply damage unless accompanied by roughness increase or cracking.
Can cleaning methods shorten zirconia crucible life
Aggressive mechanical or chemical cleaning accelerates damage accumulation. Scraping forces above 20–30 N or abrasive contact can introduce microchips that later propagate under thermal cycling. Chemical cleaning that leaves alkali or silica residues above 0.1 wt% promotes grain boundary embrittlement during subsequent heats.
Conclusion
Ultimately, preventing Zirconia Crucible Failure in Melting and Casting depends on disciplined thermal control, accurate crack interpretation, and early intervention before minor damage escalates into structural loss.
References:


