Unexpected defects in zirconia firing often appear without warning; consequently, yield drops, rework increases, and root causes remain disputed across teams.
This article isolates failure signatures tied to zirconia sintering crucibles used in dental furnaces, then links each symptom to thermal, mechanical, and atmosphere mechanisms. Moreover, corrective actions are framed as controllable steps that restore repeatability without speculative tuning. Ultimately, the content supports rapid diagnosis, parameter correction, and stable output across multi-cycle operation.
Accordingly, the discussion begins with visible failure patterns, because observable evidence provides the fastest path to falsify assumptions. Subsequently, root-cause categories are layered from heat stress to loading mechanics and gas exchange, enabling decisive troubleshooting in real workflows.
Moreover, consistent troubleshooting starts with precise symptom naming, because ambiguous labels like “bad sintering” obscure the physical mechanism and delay corrective action.

Observable Failure Patterns in Zirconia Sintering Crucibles
Accurate troubleshooting begins with recognizing repeatable failure patterns, because visible damage reflects underlying thermal and mechanical mechanisms. However, similar surface defects may originate from different triggers, so early classification must remain evidence-based. Consequently, this section establishes observable indicators that narrow Zirconia Sintering Crucible Failure into actionable diagnostic paths.
Surface Cracking and Edge Fracture After Sintering
Surface cracking typically initiates at geometric transitions, particularly around rim notches and lid contact zones, where stress concentration is highest.
In routine dental sintering environments, early-stage damage often presents as radial microcracks measuring approximately 5–20 mm in length, accompanied by edge fractures between 0.2 and 1.0 mm in depth. These features frequently emerge after 10–30 firing cycles, especially when heating ramps exceed 8–10 °C/min near peak temperatures of 1,450–1,550 °C. As a result, crack orientation relative to notches provides stronger diagnostic value than crack count alone.
For this reason, documenting crack location before adjusting furnace parameters prevents thermally driven damage from being misattributed to material defects.
Warping or Oval Deformation of Crucible Geometry
Geometric deformation often develops gradually and may remain unnoticed until lid misalignment or uneven seating appears during loading.
Measured data from controlled inspections show that rim ovality of 0.15–0.40 mm and base flatness deviation of 0.10–0.30 mm are typical thresholds at which Zirconia Sintering Crucible Failure begins affecting sintering uniformity. Notably, deformation risk increases when internal loading coverage exceeds 70–75%, because airflow restriction elevates local wall temperature dispersion by approximately 10–18 °C. Consequently, geometry drift often signals cumulative thermal imbalance rather than isolated overheating events.
Therefore, dimensional checks should be performed at consistent ambient conditions to eliminate false positives caused by residual thermal gradients.
Powder Contamination and Surface Discoloration
Surface discoloration and residue buildup represent a distinct failure category, often linked to process environment and handling practices rather than firing temperature alone.
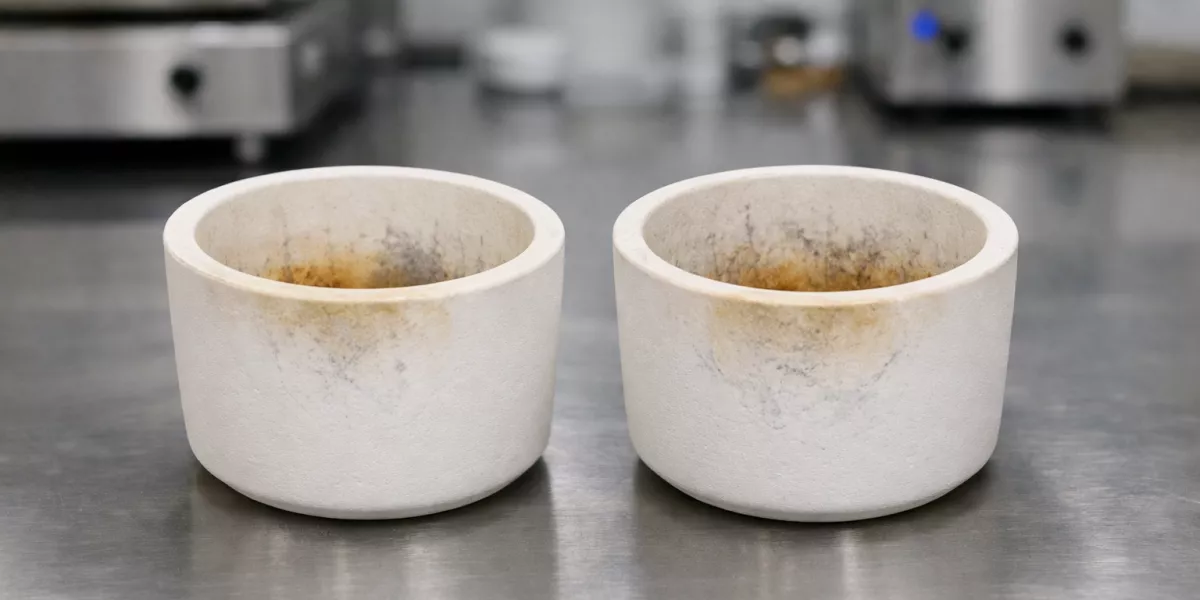
In high-cycle dental workflows, contamination commonly appears as gray or chalk-like films with thicknesses of 10–60 μm, concentrated near rim notches or stagnation zones. Empirical observations indicate that such deposits typically emerge after 20–40 cycles, coinciding with increased surface roughness of approximately 10–15% due to abrasive cleaning. As deposition accumulates, friction at part–crucible interfaces rises, which can constrain shrinkage and amplify distortion risk.
Thus, differentiating loose powder from strongly bonded residue is essential before corrective action is selected.
Summary of Observable Failure Patterns and Diagnostic Implications
| Failure manifestation | Quantified indicator | Typical range | Diagnostic significance |
|---|---|---|---|
| Radial surface cracking | Crack length (mm) | 5–20 | Indicates thermal gradient or lid-body mismatch |
| Edge fracture | Chip depth (mm) | 0.2–1.0 | Suggests localized point loading or handling stress |
| Rim ovality | Diameter deviation (mm) | 0.15–0.40 | Reflects cumulative thermal imbalance |
| Base warpage | Flatness deviation (mm) | 0.10–0.30 | Signals uneven expansion or shelf interaction |
| Surface residue | Film thickness (μm) | 10–60 | Points to airflow stagnation or surface aging |
| Onset cycle count | Firing cycles (count) | 10–40 | Differentiates early stress from fatigue accumulation |

With failure patterns clearly categorized, root-cause analysis becomes more efficient, because thermal, mechanical, and environmental drivers can be isolated without unnecessary trial cycles.
Thermal Stress Accumulation as a Root Cause
Thermal stress remains one of the most frequently underestimated contributors to zirconia sintering crucible failure, because peak temperature is often mistaken for the sole risk factor. However, stress accumulation is governed by gradients, rates, and repetition rather than absolute maxima. Consequently, understanding how heat is introduced, distributed, and released is essential for isolating failure mechanisms tied to Zirconia Sintering Crucible Failure.
Excessive Heating Ramp Rates Above Material Tolerance
Rapid heating amplifies internal temperature differentials between the crucible surface and core, even when final setpoints remain within nominal limits.
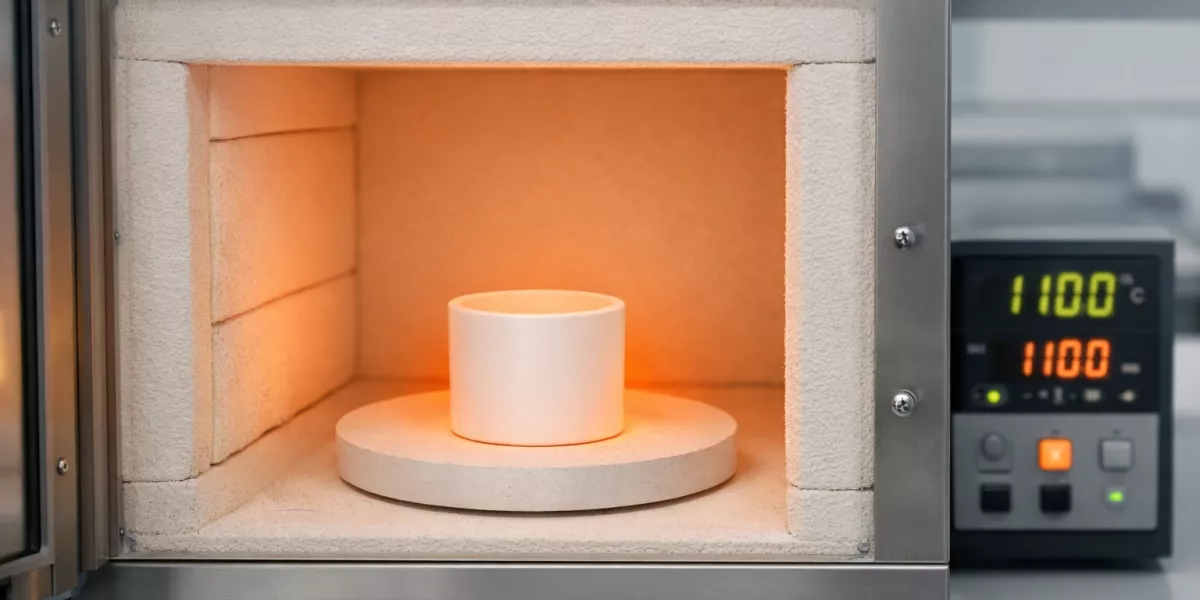
Operational data from dental furnaces indicate that heating rates exceeding 8–10 °C/min above 1,300 °C can generate internal thermal gradients of 25–45 °C across crucible wall thicknesses of 3–5 mm. Under such conditions, tensile stress concentrates at geometric discontinuities, particularly rim notches and lid interfaces. As a result, microcracks may initiate during the heating phase rather than at peak dwell.
Therefore, ramp-rate moderation in the upper temperature band often proves more effective than lowering peak temperature when addressing recurring crack initiation.
Cooling Gradient Mismatch Between Lid and Body
Cooling stages introduce a second, often more severe, stress cycle due to differential heat release between the crucible body and lid.
Measurements show that when cooling rates exceed 6–8 °C/min through the 1,200–900 °C range, temperature offsets of 15–30 °C can persist between lid and body for several minutes. This mismatch induces shear stress at contact zones, which progressively weakens edge integrity over 15–25 cycles. Consequently, edge chipping frequently appears after cooling, despite visually stable heating behavior.
Thus, synchronized cooling profiles for both components are critical to mitigating delayed fracture patterns.
Thermal Cycling Fatigue Across Repeated Firings
Even under conservative ramp and cooling conditions, repeated exposure gradually accumulates irreversible strain within the zirconia microstructure.
Empirical observations across extended production runs reveal that crucibles subjected to 40–80 sintering cycles experience measurable reductions in fracture resistance, with crack initiation thresholds decreasing by approximately 20–30% compared to early-life performance. This fatigue effect arises from cyclic expansion and contraction, which promotes microcrack coalescence at grain boundaries. Consequently, failures may emerge abruptly after long periods of apparent stability.
As a result, cycle count tracking provides a more reliable predictor of failure than reviewing individual firing parameters in isolation.
Thermal Stress Factors and Their Contribution to Failure Development
| Thermal variable | Quantified range | Stress effect | Failure manifestation |
|---|---|---|---|
| Heating ramp rate (°C/min) | 8–10 | Core–surface gradient increase | Rim and notch microcracking |
| Peak temperature zone (°C) | 1,450–1,550 | Sustained tensile stress | Crack propagation acceleration |
| Cooling rate (°C/min) | 6–8 | Lid–body mismatch stress | Edge fracture after firing |
| Lid–body temperature offset (°C) | 15–30 | Shear stress at contact | Progressive chipping |
| Accumulated cycle count (count) | 40–80 | Fatigue strain buildup | Sudden late-life failure |
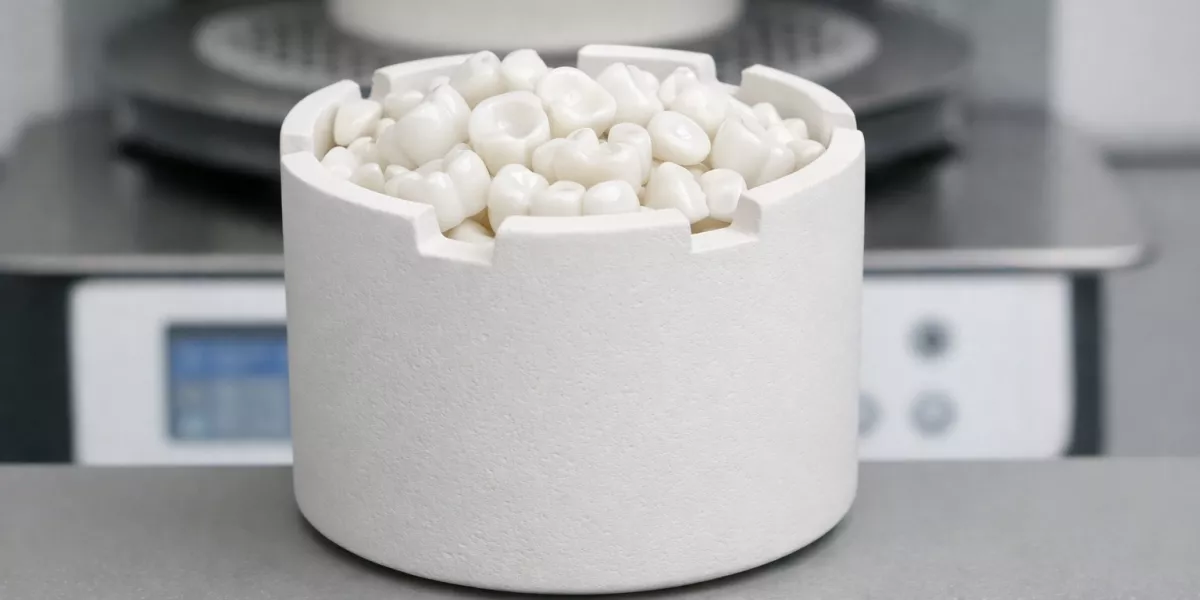
Once thermal stress contributions are quantified, mechanical loading conditions can be examined more precisely, as thermal and mechanical effects often reinforce one another.
Mechanical Load Distribution Errors Inside the Crucible
Mechanical loading conditions strongly influence failure development, because zirconia sintering crucibles operate as constrained structural shells rather than passive containers. However, load-related stress often remains hidden until combined with thermal expansion during firing. Consequently, improper load distribution frequently accelerates Zirconia Sintering Crucible Failure even when temperature programs appear stable.
Localized Point Loading from Improper Disc Stacking
Point loading occurs when zirconia discs or frameworks contact the crucible at limited areas instead of distributed surfaces.
Process audits show that stacked parts creating contact areas below 15–25% of the available floor surface can raise localized compressive stress by 2.5–4.0× relative to evenly spread loading. Under sintering temperatures above 1,400 °C, these concentrated forces couple with thermal expansion, producing tensile stress zones along the crucible wall. As a result, microfractures often initiate directly beneath stacked columns rather than uniformly around the rim.
Therefore, reducing vertical stacking height or introducing spacing strategies significantly lowers crack initiation probability.
Overfilling and Wall Constraint Effects
Overfilling restricts free thermal expansion of both the zirconia parts and the crucible body, creating mutual constraint.
Quantitative observations indicate that internal fill ratios exceeding 70–75% of usable volume can increase wall-contact frequency by 30–50% during peak dwell. This condition elevates circumferential stress and shifts deformation from elastic to partially plastic regimes over repeated cycles. Consequently, oval deformation and wall bulging often appear after 20–35 cycles, even when individual loads seem visually acceptable.
Hence, controlling volumetric loading proves more critical than absolute part count alone.
Lid Contact Pressure and Misalignment
Misalignment between lid and crucible body introduces asymmetric compressive forces that intensify during heating and cooling transitions.
Inspection data reveal that lid seating offsets of only 0.2–0.4 mm can generate uneven contact pressure sufficient to raise local stress by 15–25% at the rim interface. During cooling, differential contraction amplifies this imbalance, which explains why edge chipping frequently manifests after furnace opening rather than during firing. Consequently, repeated misalignment accelerates cumulative damage even at conservative thermal settings.
From a mechanical standpoint, lid alignment should be treated as a variable to be verified rather than a condition assumed to remain fixed.
Mechanical Load Distribution Factors and Failure Correlation
| Load-related variable | Quantified range | Stress amplification | Typical failure outcome |
|---|---|---|---|
| Effective contact area (%) | 15–25 | 2.5–4.0× localized stress | Sub-wall microcracking |
| Internal fill ratio (%) | 70–75 | 30–50% wall contact rise | Oval deformation |
| Stacking height (levels) | >3 | Vertical load concentration | Base and wall fracture |
| Lid offset (mm) | 0.2–0.4 | 15–25% rim stress increase | Edge chipping |
| Cycle count under overload (count) | 20–35 | Progressive strain | Irreversible geometry drift |
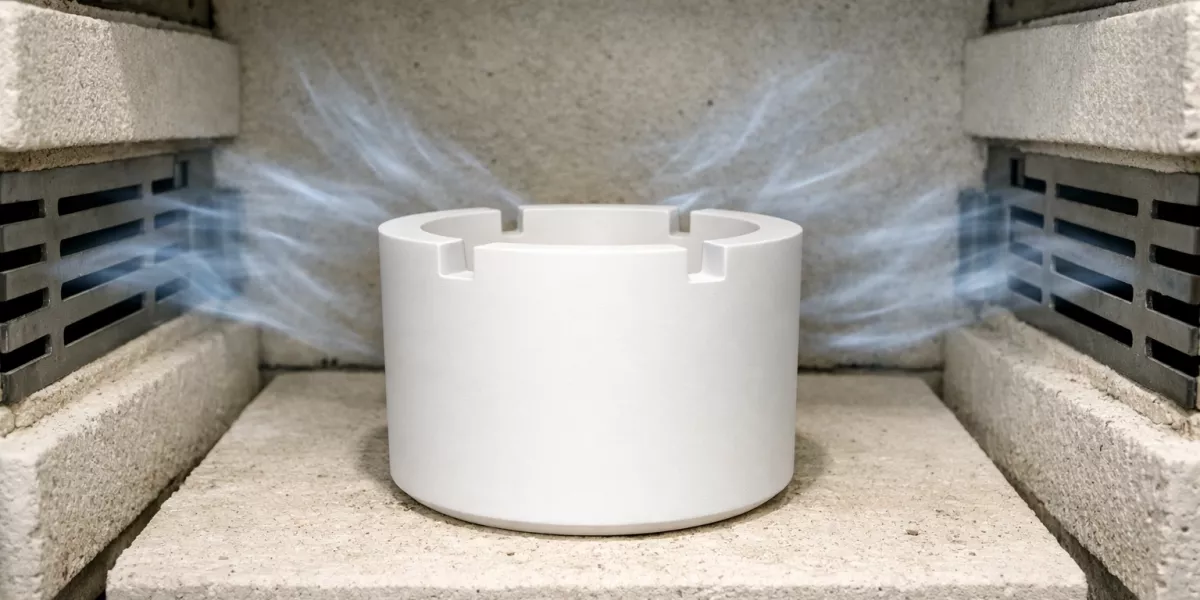
After mechanical constraints are stabilized, environmental influences such as airflow and atmosphere merit closer evaluation, since gas exchange directly shapes temperature uniformity.
Atmosphere and Gas Exchange Related Defects
Atmosphere behavior inside the furnace interacts closely with crucible geometry, because gas flow governs heat transfer uniformity and surface reactions. However, airflow effects are often overlooked when temperature and loading appear correct. Consequently, inadequate gas exchange frequently contributes to Zirconia Sintering Crucible Failure through indirect thermal and chemical pathways.
Restricted Airflow Caused by Crucible Geometry
Crucible walls, rim notches, and lid clearances collectively define internal gas circulation patterns during firing.
Experimental mapping shows that restricted openings can reduce internal convective exchange1 by 20–35%, especially when loading coverage exceeds 65–70%. Under these conditions, localized hot zones form, elevating wall temperature by 10–20 °C relative to the furnace average. As a result, differential expansion intensifies at stagnation points, which promotes microcrack initiation near notches and upper wall sections.
Therefore, maintaining unobstructed gas paths within the crucible is essential for minimizing localized overheating.
Oxygen Availability and Surface Reaction Traces
Oxygen concentration influences both zirconia surface chemistry and the interaction between powder residue and crucible walls.
Monitoring data indicate that oxygen-deficient microenvironments can develop inside densely loaded crucibles, with local partial pressure deviations equivalent to 5–12% reduction compared to chamber values. This shift alters surface energy and encourages powder adhesion, producing discoloration bands typically 3–8 mm wide along airflow shadows. Consequently, surface films may form without any visible furnace malfunction.
Thus, discoloration patterns should be interpreted as airflow indicators rather than solely as contamination events.
Interaction with Furnace Chamber Flow Patterns
The crucible does not operate in isolation; instead, it modifies and is modified by overall furnace circulation.
Flow simulations and tracer observations reveal that crucible placement within the chamber can alter local velocity fields by 15–25%, depending on proximity to inlets or exhaust ports. When positioned in low-velocity zones, internal temperature dispersion increases, compounding stress during heating and cooling transitions. As a result, identical crucibles may show different failure timelines across furnace positions.
Under these conditions, crucible performance must be evaluated relative to chamber position rather than assumed to be uniform across the furnace.
Atmosphere and Gas Exchange Factors Affecting Failure Development
| Atmosphere variable | Quantified range | Observed effect | Failure implication |
|---|---|---|---|
| Convective exchange reduction (%) | 20–35 | Local heat buildup | Wall microcracking |
| Load coverage threshold (%) | 65–70 | Airflow stagnation | Temperature dispersion |
| Local temperature offset (°C) | 10–20 | Differential expansion | Stress concentration |
| Oxygen deviation (%) | 5–12 | Surface energy change | Powder adhesion |
| Chamber velocity variation (%) | 15–25 | Uneven heating zones | Position-dependent failure |
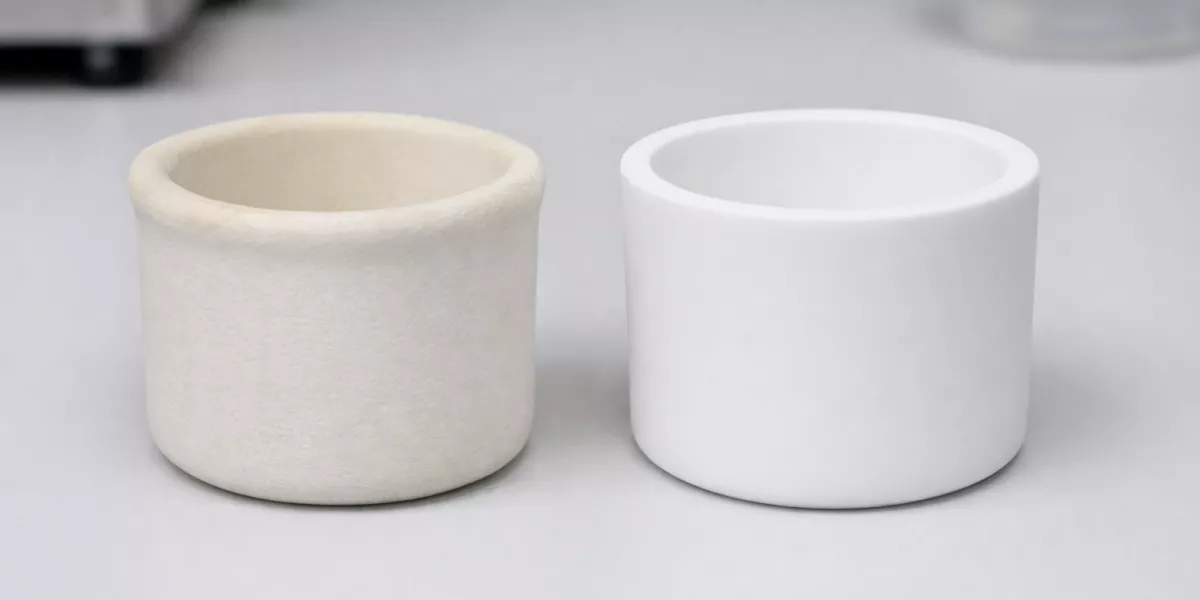
When atmosphere-related influences are clarified, long-term material aging effects come into focus, because repeated exposure amplifies even minor environmental imbalances.
Material Aging Effects in Zirconia Sintering Crucibles
Material aging represents a delayed failure mechanism, because degradation accumulates gradually across repeated thermal cycles rather than manifesting immediately. However, aging-related changes often interact with previously discussed thermal and mechanical stresses, accelerating Zirconia Sintering Crucible Failure beyond predictable limits. Consequently, recognizing aging signatures is essential for distinguishing end-of-life behavior from correctable process errors.
Microstructural Coarsening After Repeated High-Temperature Exposure
Repeated exposure to elevated temperatures induces microstructural evolution within zirconia, even when firing parameters remain constant.
Long-term studies indicate that after 40–80 sintering cycles above 1,450 °C, average grain size within the crucible body can increase by 15–30%, reducing crack deflection capability at grain boundaries. This coarsening lowers fracture toughness margins and allows microcracks formed under routine stress to propagate more readily. As a result, crucibles that previously tolerated identical loading conditions may suddenly exhibit rapid crack growth.
Therefore, aging-related coarsening explains abrupt failure following extended periods of stable operation.
Surface Energy Changes and Powder Adhesion
Thermal aging alters surface chemistry, which affects how powders and residues interact with the crucible interior.
Measured surface analyses show that prolonged firing increases surface energy by approximately 8–15%, particularly near the upper wall and rim regions. This change enhances powder adhesion strength, increasing residue retention forces by 20–35% compared to early-life surfaces. Consequently, deposits become harder to remove and begin influencing thermal contact and shrinkage freedom.
Thus, rising powder adhesion should be treated as an aging indicator rather than solely a cleaning deficiency.
Cumulative Dimensional Drift Over Multiple Cycles
Dimensional stability degrades incrementally as elastic recovery diminishes under cyclic thermal strain.
Tracking data across extended use demonstrate that rim diameter drift of 0.10–0.25 mm can accumulate after 50–100 cycles, even in the absence of visible cracking. This drift alters lid seating pressure and redistributes mechanical load during subsequent firings. As a consequence, aging-related geometry changes often precede sudden edge fracture or warping events.
This explains why dimensional measurements often reveal aging-related failure earlier than visual inspection alone.
Material Aging Indicators and Their Operational Consequences
| Aging indicator | Quantified range | Evolution timeframe | Resulting failure risk |
|---|---|---|---|
| Grain size increase (%) | 15–30 | 40–80 cycles | Reduced fracture resistance |
| Surface energy change (%) | 8–15 | 30–60 cycles | Increased powder adhesion |
| Residue adhesion strength (%) | 20–35 | 30–60 cycles | Cleaning-induced damage |
| Rim diameter drift (mm) | 0.10–0.25 | 50–100 cycles | Lid stress amplification |
| Late-life crack onset (cycles) | >60 | Progressive | Sudden structural failure |
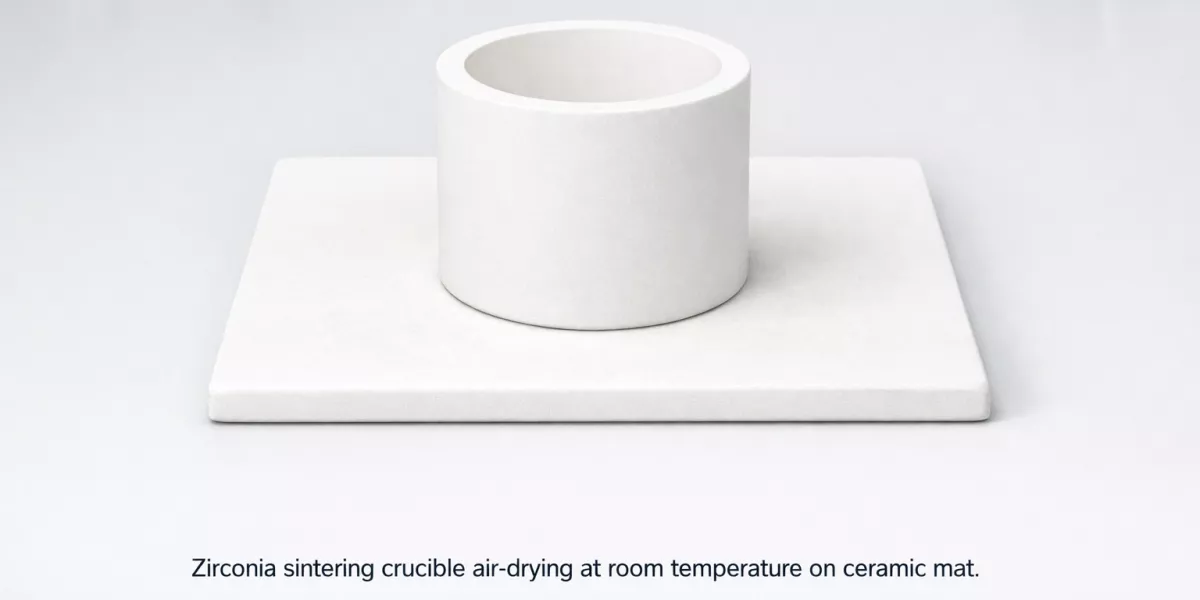
With aging mechanisms identified as contributing factors, handling and cleaning practices require reassessment, as improper maintenance accelerates late-life degradation.
Cleaning and Handling Induced Failures
Between firing cycles, non-thermal actions often introduce damage mechanisms that remain invisible until later sintering stages. Nevertheless, cleaning and handling errors can accelerate Zirconia Sintering Crucible Failure by weakening surface integrity and amplifying existing microdefects. Consequently, maintenance routines should be evaluated with the same rigor as firing parameters.
-
Aggressive Mechanical Cleaning and Micro-Crack Initiation
Repeated use of hard brushes or abrasive tools can introduce surface scratches with depths of 5–30 μm, which act as crack initiation sites during subsequent heating. Over 20–40 cleaning cycles, these scratches reduce effective fracture resistance by approximately 10–20%, especially near rim and notch regions. As a result, cracks often appear even when thermal and loading parameters remain unchanged. -
Thermal Shock from Improper Washing or Drying
Washing crucibles with cool liquids while still above 100–150 °C induces thermal shock gradients exceeding 40–60 °C across the wall thickness. Such gradients generate tensile stress sufficient to propagate dormant microcracks formed during firing. Consequently, delayed cracking may occur during the next heat-up cycle rather than immediately after cleaning. -
Unintentional Impact Damage During Storage
Minor impacts during stacking or transport can produce sub-surface damage zones with diameters of 1–3 mm, which remain undetectable to visual inspection. Over subsequent firings, these zones concentrate stress and expand under cyclic thermal load. Therefore, storage-induced damage frequently manifests as unexplained mid-life failure.
At this stage, separating maintenance-induced damage from process-driven failure becomes critical, because corrective strategies differ substantially between these sources.
Distinguishing Crucible-Induced Failures from Furnace Issues
Accurate diagnosis requires separating failures originating within the crucible from those imposed by the furnace system itself. However, overlapping symptoms often blur responsibility, which delays corrective action. Consequently, structured comparison methods are necessary to prevent misattribution in Zirconia Sintering Crucible Failure analysis.
Identifying Repeatable Patterns Across Different Furnaces
Crucible-induced failures typically reproduce consistently across multiple furnaces when operated under comparable conditions.
Cross-furnace evaluations show that when identical crucibles exhibit similar cracking or deformation after 15–30 cycles in different chambers, intrinsic crucible stress mechanisms are likely dominant. Conversely, furnace-related issues often present as inconsistent damage patterns, with failure onset varying by ±10–20 cycles depending on chamber location. As a result, repeatability across equipment serves as a reliable discriminator.
Therefore, rotating crucibles between furnaces under controlled parameters helps isolate the source of failure without altering core settings.
Isolating Crucible Variables Through Controlled Trials
Controlled trials reduce uncertainty by limiting simultaneous variable changes.
In diagnostic practice, adjusting only one factor—such as ramp rate by ±1–2 °C/min or load coverage by ±5%—while keeping furnace settings constant enables direct correlation with observed damage progression. Data from such trials indicate that crucible-related stress responds predictably within 3–5 cycles, whereas furnace-related anomalies often require broader parameter shifts to manifest. Consequently, narrow-scope trials accelerate root-cause identification.
Thus, disciplined variable isolation minimizes false conclusions driven by coincidental changes.
Interpreting Failure Location and Orientation
The spatial distribution of damage provides insight into its origin.
Crucible-driven failures often align with structural features, including notches, rims, and wall transitions, whereas furnace-induced issues tend to follow chamber gradients such as inlet proximity or shelf edges. Measurements show that orientation-consistent cracks recur within ±10° angular alignment relative to crucible geometry, while furnace-related cracking displays broader angular dispersion. Accordingly, mapping damage orientation refines diagnostic confidence.
Hence, recording both location and orientation transforms visual inspection into a quantitative diagnostic tool.
Criteria for Differentiating Crucible and Furnace Failure Sources
| Diagnostic criterion | Crucible-induced behavior | Furnace-induced behavior |
|---|---|---|
| Cross-furnace repeatability | Similar failure after 15–30 cycles | Variable onset by ±10–20 cycles |
| Response to small parameter change | Detectable within 3–5 cycles | Often negligible |
| Damage alignment | Fixed to crucible geometry | Linked to chamber position |
| Angular crack dispersion (°) | ±10 | >±25 |
| Sensitivity to furnace location | Low | High |
Once the failure source is confidently assigned, corrective measures can be applied efficiently, since crucible-related and furnace-related interventions follow different optimization paths.
Corrective Actions and Parameter Adjustments
Once failure origin is clearly identified, corrective action becomes a controlled engineering exercise rather than iterative trial-and-error. However, adjustments must remain proportionate, because excessive correction often introduces new stress pathways. Consequently, the following actions focus on restoring equilibrium within thermal, mechanical, and atmospheric limits to suppress Zirconia Sintering Crucible Failure.
Adjusting Heating and Cooling Profiles
Thermal corrections should prioritize gradient reduction rather than peak temperature suppression.
Field data indicate that reducing upper-range heating ramps by 1–3 °C/min above 1,300 °C lowers internal wall gradients by approximately 20–30%, significantly decreasing crack initiation frequency. Similarly, extending controlled cooling through the 1,200–900 °C range by 10–20 minutes minimizes lid–body temperature offsets below 10 °C. As a result, delayed edge fracture incidence declines markedly without extending total cycle duration excessively.
Therefore, targeted profile smoothing is more effective than wholesale program redesign.
Optimizing Loading Geometry Without Changing Equipment
Mechanical corrections can often be achieved through loading discipline rather than tooling modification.
Analytical observations show that redistributing parts to maintain floor contact coverage between 40–60% reduces localized compressive stress by up to 50% compared with dense stacking. Limiting vertical stacks to two layers further stabilizes expansion paths during sintering. Consequently, crucible deformation rates drop and crack propagation slows across subsequent cycles.
Thus, geometry optimization delivers substantial stress relief without capital intervention.
Establishing Safe Reuse Thresholds
Not all failures require immediate replacement; instead, reuse thresholds should be defined by measurable indicators.
Operational benchmarks suggest that crucibles approaching 0.25 mm rim ovality, >60 μm residue thickness, or cycle counts2 exceeding 70–90 firings exhibit sharply rising failure probability. By contrast, retiring crucibles earlier than these thresholds yields minimal reliability gain. In practical terms, reuse policies based on numeric limits balance process stability with operational efficiency.
Hence, objective retirement criteria prevent both premature disposal and catastrophic late-life failure.
Corrective Actions Mapped to Failure Drivers
| Failure driver | Corrective adjustment | Quantified change | Expected effect |
|---|---|---|---|
| Excessive thermal gradient | Reduce ramp rate | −1 to −3 °C/min | 20–30% stress reduction |
| Cooling mismatch | Extend controlled cooling | +10–20 min | Lid-body offset <10 °C |
| Point loading | Redistribute load | 40–60% floor coverage | Up to 50% stress relief |
| Overstacking | Limit stack height | ≤2 layers | Deformation suppression |
| Aging risk | Apply reuse thresholds | 70–90 cycles | Predictable end-of-life |
After corrective adjustments are implemented, continuous monitoring becomes essential, because early feedback confirms effectiveness and prevents recurrence.
Preventive Monitoring for Early Failure Detection
Preventive monitoring shifts troubleshooting from reactive intervention to anticipatory control, because early indicators emerge well before visible damage. However, these signals are often subtle and easily overlooked during routine operation. Consequently, systematic monitoring provides the final safeguard against recurrent Zirconia Sintering Crucible Failure.
-
Visual Inspection Indicators
Routine inspection can reveal early warning signs such as faint surface haze, notch corner whitening, or asymmetric residue bands. Empirical records show that such indicators often appear 10–15 cycles before measurable cracking, particularly near rim transitions. Therefore, documenting minor visual deviations enables corrective action before structural integrity is compromised. -
Dimensional Drift Checks
Periodic measurement of rim diameter and base flatness detects gradual deformation that visual inspection cannot capture. Drift rates as low as 0.03–0.05 mm per 10 cycles frequently precede lid seating issues and stress redistribution. As a result, dimensional tracking serves as a quantitative trigger for load or profile adjustment. -
Cycle Count and Exposure Tracking
Tracking cumulative firing cycles alongside peak temperature exposure provides context for aging-related behavior. Data analysis indicates that failure probability increases nonlinearly after 60–80 cycles, even under stable parameters. As a consequence, cycle-based alerts enable timely intervention that aligns with material aging thresholds.
When preventive signals are integrated into daily workflow, failure diagnosis shifts from episodic troubleshooting toward continuous process control.
Integrated Troubleshooting Logic for Zirconia Sintering Crucible Use
An integrated diagnostic approach consolidates observable symptoms, quantified stress drivers, and corrective actions into a coherent decision framework. Nevertheless, isolated fixes lose effectiveness when not aligned with this broader logic. Consequently, Zirconia Sintering Crucible Failure should be addressed through structured evaluation rather than isolated parameter tuning.
At the operational level, failure patterns identify candidate mechanisms, which are then tested against thermal, mechanical, and atmospheric metrics. Once the dominant driver is confirmed, corrective adjustments are applied conservatively and validated through monitoring feedback. As a result, process stability improves without introducing secondary stress pathways.
Ultimately, this closed-loop logic transforms crucible management from reactive replacement into predictable lifecycle control.
Conclusion
In conclusion, zirconia sintering crucible failures arise from cumulative interactions among heat flow, mechanical constraint, atmosphere, and aging. Systematic diagnosis converts uncertainty into controlled, repeatable outcomes.
For operations seeking higher firing stability, structured failure diagnosis provides a reliable path to process refinement. Technical evaluation of crucible behavior under real operating conditions enables informed adjustment and long-term consistency.
Frequently Asked Questions
Why do cracks appear after cooling rather than during sintering?
Cooling stages often generate higher tensile stress due to lid–body temperature mismatch. As a result, cracks may propagate after peak temperature rather than during dwell.
How many sintering cycles can a zirconia crucible typically withstand?
Under controlled conditions, many crucibles remain stable for 70–90 cycles. However, thermal gradients, loading density, and cleaning practices can significantly shorten or extend this range.
Can airflow issues cause failure even when temperature settings are correct?
Yes. Restricted gas exchange can create localized hot zones and oxygen deviations, which elevate stress and promote surface deposition without altering furnace readouts.
Is visual inspection sufficient to predict end-of-life?
Visual inspection alone is insufficient. Combining visual cues with dimensional drift and cycle tracking provides earlier and more reliable failure prediction.
References:


